

I have to say that I’m feeling pretty accomplished after this make. It has been rather akin to childbirth though. I have struggled through many parts of its construction but now it’s made I absolutely adore it and am loathed to take it off.
This is a lengthy review, but it is a more complex make and one that I know a lot of you are contemplating making so I hope that you will find it helpful and will be inspired to give it a go.
I just want to point out before I go into the details, most of my difficulties have been due to my MS (having numbness in my fingers and no strength in my hands. So if you are thinking of possibly making a Kelly anorak please don’t be put off and do give it a try; It really is the most fantastic project. There are a few things that I mention that will apply to anyone but everything else will probably only be an issue if you have similar health problems to me.
First thing fist, this is the Kelly Anorak from Closet Core patterns it comes with the option of a drawstring waist and choices of either a hood or stand up collar. I chose to include the drawstring and went for the hood option as I wanted to be snug on my dog walks. There is also an expansion pack that you can purchase to add a lining, but as I wanted to have a jacket to wear now I didn’t need it to be super warm.
The pattern recommends light to medium weight fabrics and i really would pay attention to this as in places you will be sewing through three layers of fabric especially if you use flat fell seams. Also bear in mind the thickness and stiffness interfacing adds to the fabric. You will need the fabric to be pretty pliable as you manoeuvre it through your machine.
My fabric was a wonderful fleece backed soft shell which Minerva very kindly gifted me as part of their Ambassador program. It is such a lovely soft fabric not crisp like a lot of anorak fabrics and really is super comfy to wear. I love it so much.
I knew the fabric was washable at 30 degrees so I went ahead and washed it with a non-bio powder before I started and much to my relief it was still just as lovely afterwards and even more importantly still repelled water. I didn’t want to go to the trouble of making it only for it to shrink in its first wash but I was worried about it losing its waterproofness.
I had to make my usual FBA adjustment and tissue fitted with Swedish Tracing Paper before I started. I could of reduced the length of the sleeves slightly but I like to snuggle my fingers up inside my cuffs so decided to leave them.
My hubby very kindly cut all the pieces out for me using a rotary cutter and he said it behaved well. I ensured every piece had all its markings transferred from the pattern and kept each piece labelled to try and avoid any confusion. This is not a project to skip pattern markings.
I can’t stress enough how important it is to read the sew along before you commence this project as there are a number of errors in the earlier patterns (rectified in the sew along) and some good tips also.
I used a microtex needle and a walking foot wherever possible and found a pressing cloth and clapper were also invaluable.
The gusseted pockets were easier to make than I thought (with the help of the sew along) and I’m really pleased with how they turned out. I love the fact that they are incredibly roomy and are slight more forward than some other jackets so they are easily accessible for me sat in my wheelchair. I sometimes struggle to get into pockets if they are too far back as they get obstructed by my side guards.
I didn’t actually need to do proper flat fell seams as soft shell doesn’t fray but I wanted to make the jacket look as professional as possible so went down this route. I now wish I hadn’t done this as the project certainly would have been a lot easier if I hadn’t bothered especially the sleeves. I found these particularly tricky as the second seam of the flat fell has to be sewn once the sleeve is fully constructed so trying to feed it through the machine is tricky. It felt like some kind of endurance challenge as it could only be thread through the machine an inch at a time (if that) due to the limited space available. By the time I got to the armholes I was regretting the flat fell decision so I admitted defeat and just overlocked those.
All the other seams were a doddle compared to those. Though saying that, I did find sewing the flat fell on the reverse challenging because my eyesight isn’t the best and it wasn’t always easy to pick out the edge of the seams amongst the raised pile of the fleece so my sewing isn’t as straight as I’d like. Certainly if I’d been able to feel the difference in the thickness of the fabric that would have assisted me but numb fingers put pay to that. I’m sure anyone else would be fine.
I am overall very happy with the interior of my jacket, possibly my only thought is that I wish I’d bought more bias binding as I love how it looks and would have liked to have used it more on the back seam and to trim the hood but I couldn’t afford to wait any longer to finish this project as holiday is approaching and I want to take it with me. If you also like the look of the bias trim then you will need to buy much more than the pattern stipulates. I have only been able to do what the pattern recommended so you can see what that achieves.
I was really concerned about tackling the poppers but am pleased to report that hubby said they were surprisingly easy (much easier than he expected). We did purchase the prym tool to assist with the application though, so this definitely made the job easier. If you can stretch to this then it’s definitely a very worthwhile investment, especially if you are going to be doing projects involving eyelets or poppers in the future.
I wanted my anorak to look as professional as possible so decided to add eyelets rather than buttonholes for the drawstring waist and found some cord stoppers and cord ends to complete the look. I chose antique brass as I felt it went well with my fabric and the bias trim.
We did envisage problems attaching the cord ends as they had to be attached with a hot glue gun but this also worked out to be much easier than anticipated. How durable this will be, only time will tell, but fingers crossed it will withstand washing in the future.
I am so happy with the finished jacket, I know it’s far from perfect but for a first attempt it’s good enough for me. It’s super cosy without being too heavy and it looks really smart.
If you are thinking of trying this project I would definitely recommend it, I don’t think you’ll regret it.
Thank you so much Minerva for gifting this wonderful fabric and enabling me to make something I want to wear everyday.


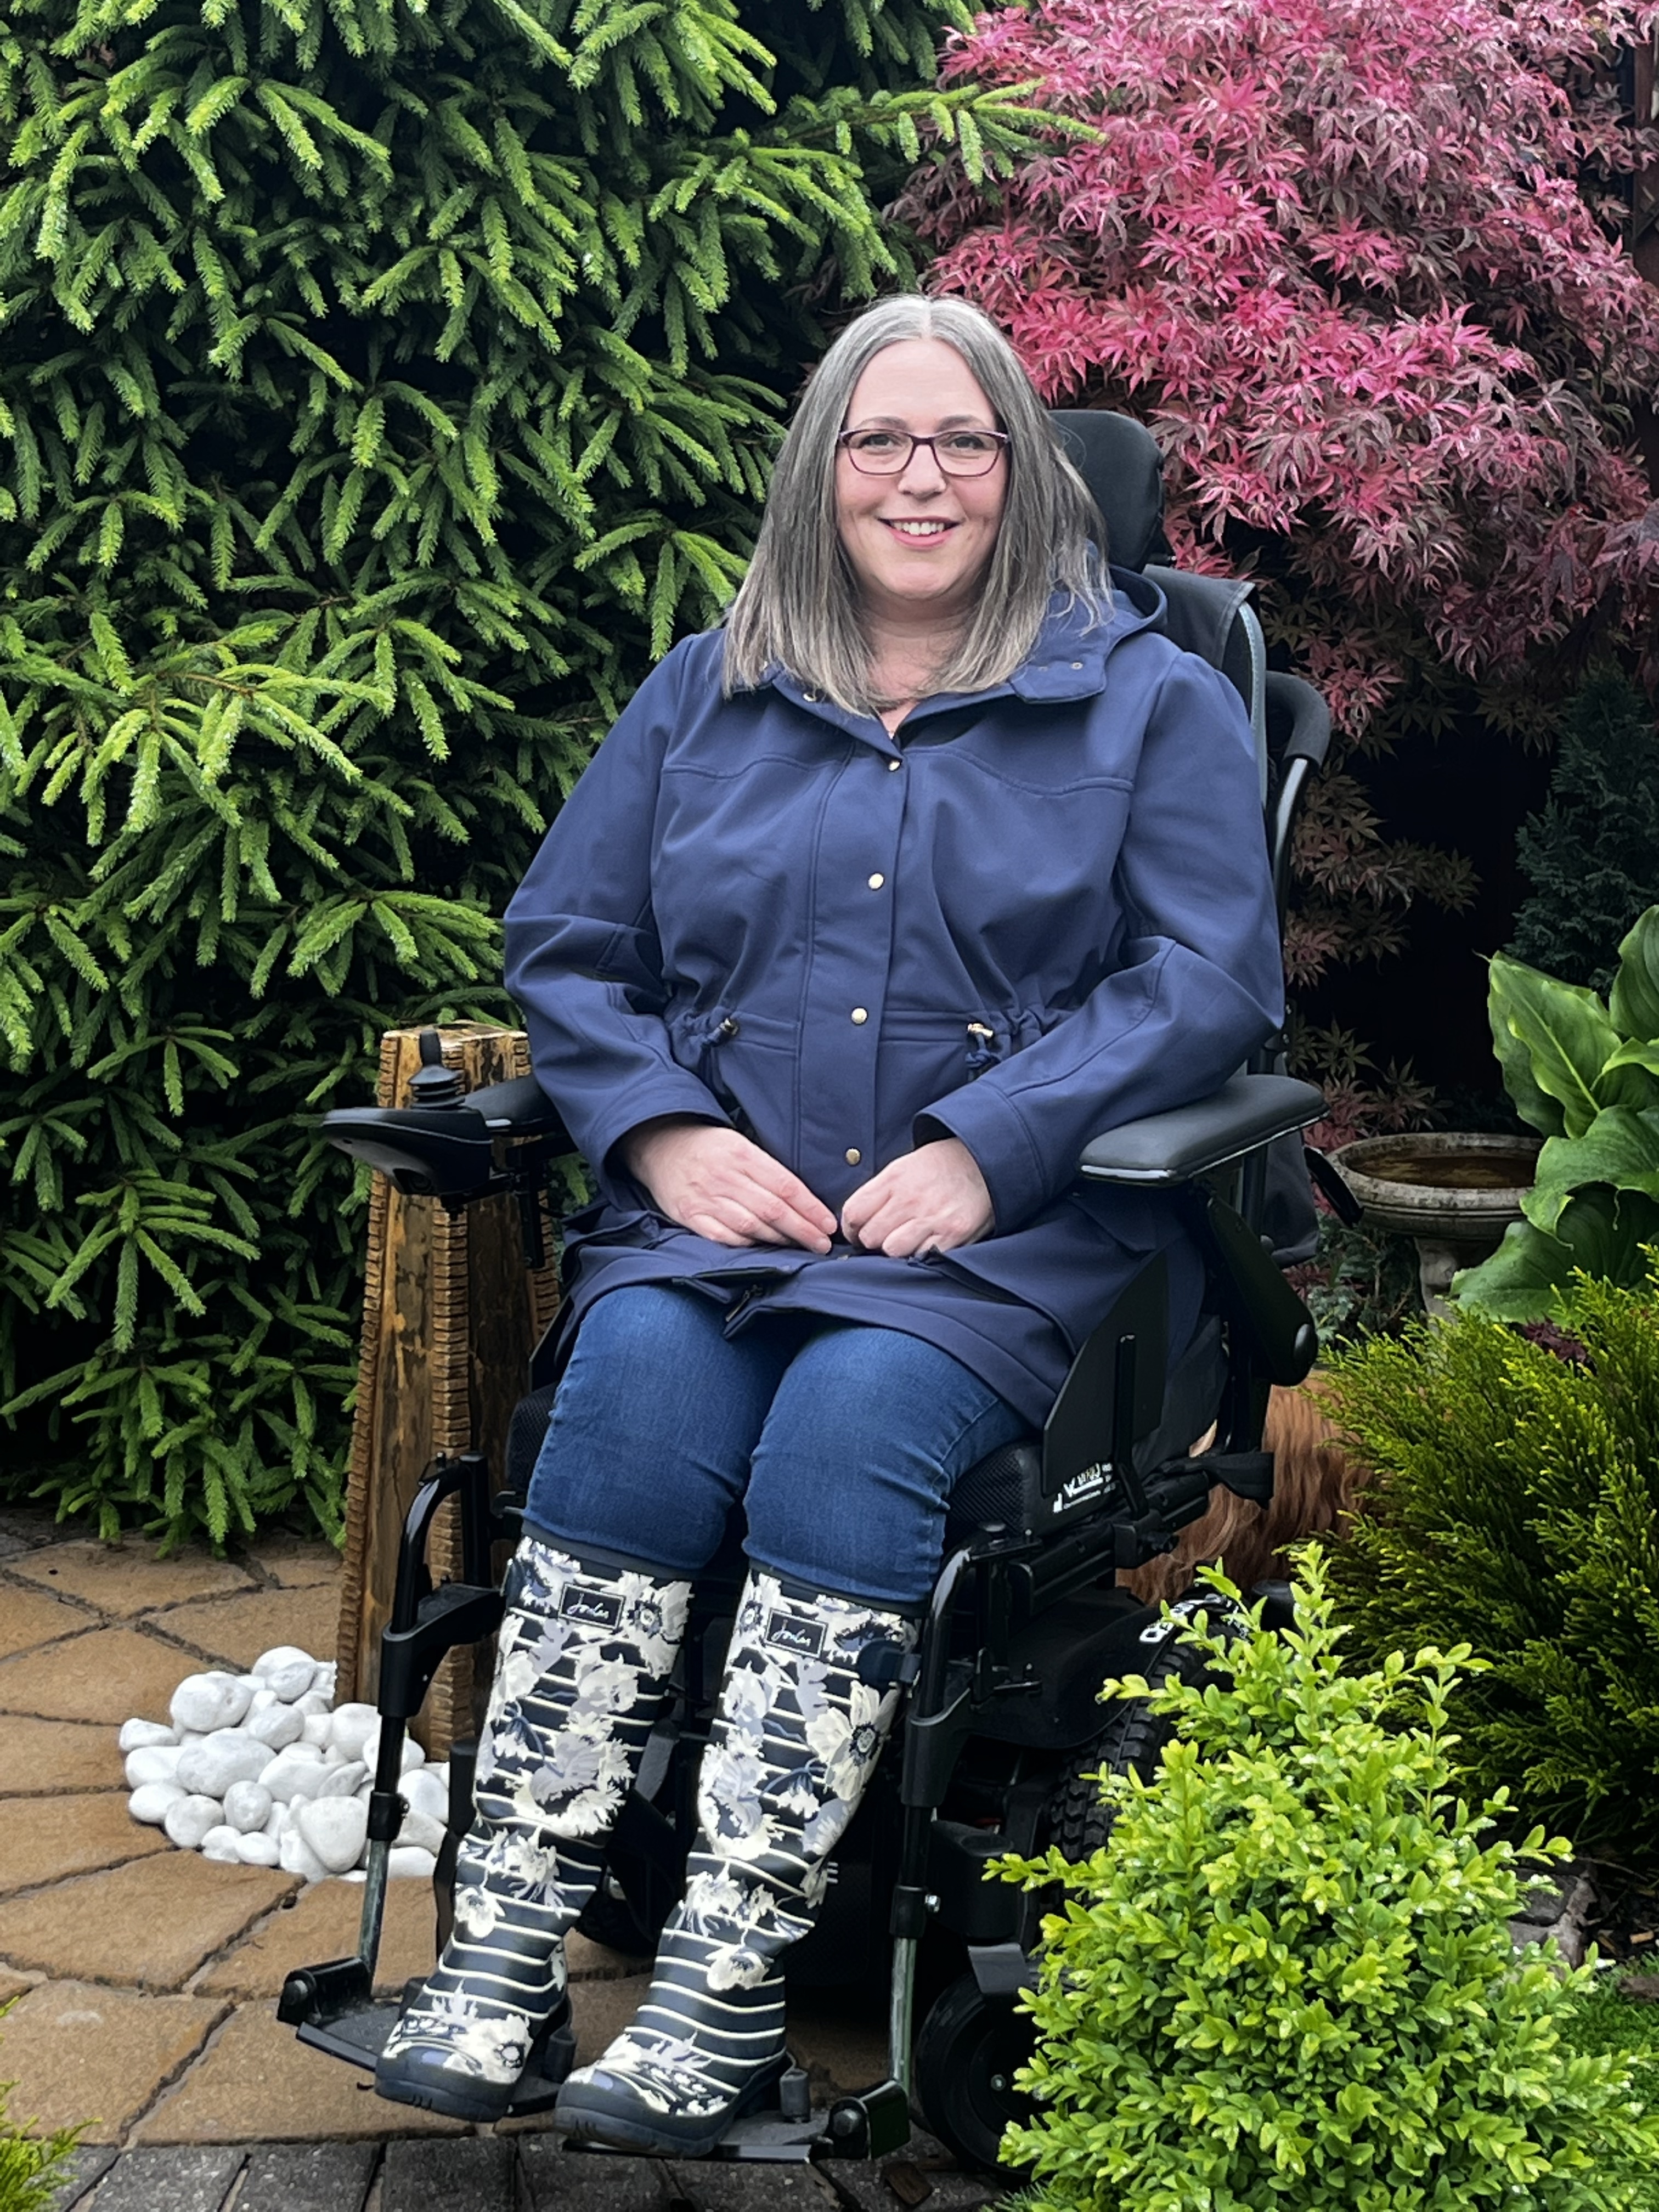
(Image Descriptions: Yvonne is a plus-size white female in her late 40’s with salt and pepper grey hair. She is pictured smiling, sat in her electric wheelchair surrounded by trees and shrubs in her garden. She is wearing blue and white wellington boots, blue skinny jeans and her navy Kelly Anorak that she has made. The pictures show the jacket from a number of different views, some open to show the interior with ochre patterned bias binding trims and some with the jacket fully done up and with the hood up.)


#MinervaBrandAmbassador, #MinervaMakes, #MinervaMakers, #DisabledSewist, #SewistsOfInstagram, #MeMadeWardrobe, #SewOver40, #SewingMakesMeHappy, #SewingTherapy, #SewingIsMyPassion, #KellyAnorakSewnShowedSeated, #IWearWhatISew, #SewingJourney#MeMadeEveryday, #SewingWithSoftshell, #SewersGonnaSew, #ILoveSewing, #IWearMyOwnClothes, #ISewMyOwnClothes, #PrymSewingSupplies, #KellyAnorak, #ClosetCorePatterns, #DisabledSewingCommunity, #DisabledSewing
Leave a Reply