
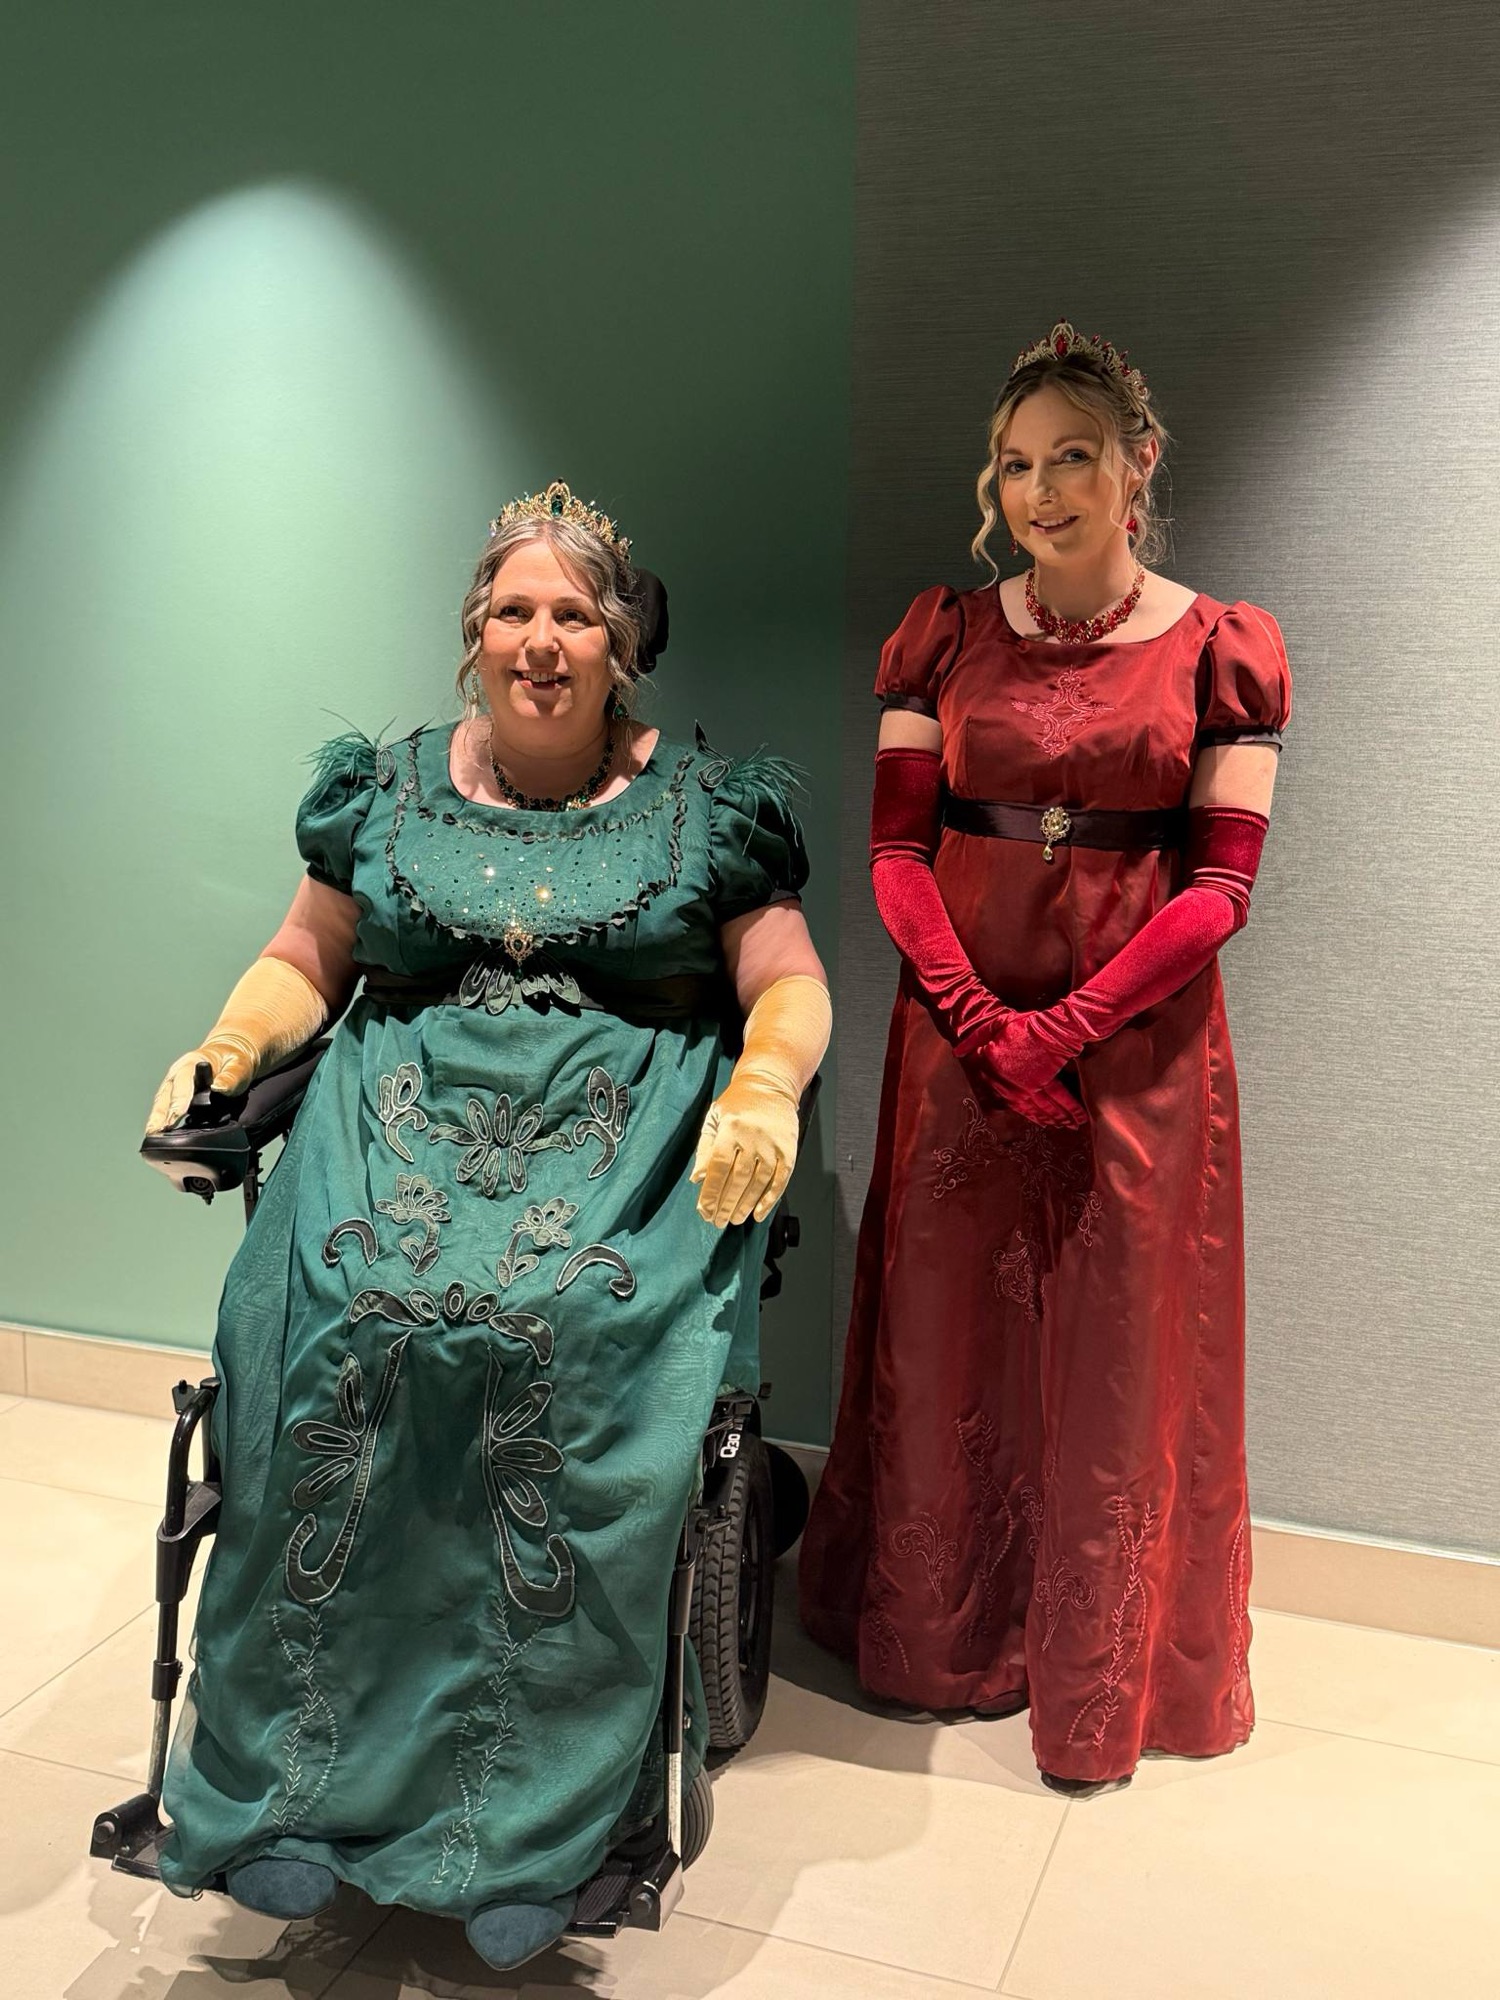

I was very fortunate to attend the Bridgetown Masquerade Ball last week which was a glorious celebration of Regency styles (with a Bridgerton vibe).
There are so many elements to discuss with my makes that I think it’s going to be easiest to break them down into different posts. So, in this first post, I’ll discuss how I made my green ballgown and then I’ll make a separate post about the masks and my daughter-in-law‘s burgundy gown.
Pattern
I did a lot of research looking at different patterns for the regency style gowns worn in Bridgerton. Although the program is based on Regency Britain (1811-1820) there are a mixture of styles of costumes with some dating far earlier. I knew that a Queen Charlotte type gown (typically worn in the 1760s) would definitely be a challenge to make wheelchair friendly, but thankfully the silhouette of an 1815s gown would be far easier to work with. I finally decided to use Laughing Moon pattern 138 opting for the higher neckline and no train.
I had initially also hoped to make pattern 115 which is a chemise and stay to go underneath but unfortunately I ran out of time. (I seriously underestimated the amount of work involved and just how hard I would find all the hand sewing).
Inspiration

I had fallen in love with Penelope’s green ball gown from Bridgerton so that was my inspiration for my dress. I loved all the little details and so set about trying to incorporate them into my gown.
Fabric
I always knew that I was going to have chiffon overlaid on taffeta and was aiming for an emerald green colour. When my initial fabrics arrived the chiffon that I’d chosen was a far too light green and so I ordered a different darker green expecting to just use that as a replacement. Unfortunately, when that arrived I was kind of like Goldilocks as that seemed way too dark and I was starting to become quite despondent, thinking I’d never get what I wanted. Quite by chance, I happened to drop the latest fabric on the table and it fell on top of the first fabrics and hey presto miraculously it created just the colour I needed. Serendipity indeed.
Construction
The instructions of the Laughing Moon pattern were very detailed and you had to really read every part of them from cover to cover as there were little snippets of information throughout. The construction is different to modern garments and the fit is different so a toile is definitely a good idea. I used a microtex needle for my general sewing and was very grateful that I had a dynamic walking foot as my fabrics were all pretty slippy. This made it all much easier. I used French seams on my chiffon but did cheat somewhat on my Tafetta where I used a very modern day overlocker to finish my open pressed seams.
I also used my overlocker to make a rolled hem on the bottom of the skirt (cheating I know) but I really couldn’t face trying to do them by hand.
Appliqué
The most striking feature for me about Penelope’s Gown is all the appliqué down the front and I really wanted to re-create this on my gown. I spent a long time creating the shapes for the applique and digitising them in my Embird embroidery software package. I knew that the chiffon wouldn’t cope having the appliqué stitched directly onto it as the amount of needle holes would tear it. So I decided to make all the appliqués separately and then hand sew them onto the chiffon.
The process of making appliqué on my sewing/embroidery machine is really pretty simple, it’s just quite time-consuming. Firstly, the outline is stitched onto water soluble stabiliser which has been put into the embroidery hoop. Next a piece of the base tafetta fabric is sprayed (on the reverse) with temporary adhesive and it is placed into the hoop over the initial outline stitching. The hoop is then put back into the machine and it stitches the outline again.
The Tafetta is then trimmed to be the same shape as the outline and finally satin stitches are sewn around the edge to complete the appliqué.
The fabric is then washed and the stabiliser magically disappears and you’re left with a little free standing appliqué.

I really struggle to use scissors because of my weak hands and found appliqué scissors a total nightmare. I tried to solve this by cutting the shapes for my appliqué using my scan and cut machine but every time they seemed to either be too short or too wide so in the end I had to admit defeat and go back to the original method of doing it all on the sewing machine and asking my husband for his help. He really didn’t like the small appliqué scissors because they were too small for his fingers, but somehow he soldiered on and we got them done.
Embroidery
The embroidery on the bottom of the dress was far easier. (I certainly wasn’t going to be able to hand sew anything) so I called upon my trusty sewing/embroidery machine again to come to my rescue . I managed to find a suitable regency design online, which I was very grateful for, as it meant I didn’t need to spend days digitising that myself. This time I did work straight onto the chiffon, using the water soluble stabiliser in the hoop. I used a matching bobbin thread so that it worked well with the transparent chiffon.

Trim
The trim on the bodice was probably the most problematic for me in terms of conception. I couldn’t find anything online that was suitable so I looked at lots of different ways of making my own and ended up designing some using the Tafetta and cutting them out with my scan and cut machine. I then used Fray check on the edges to stop them from fraying . I could of used the flame from a lighter, but I didn’t feel confident doing it that way, I envisaged setting fire to myself or burning down my house!

Embellishments
The bodice is embellished with a combination of hotfix crystals and sequins in different sizes with a vintage brooch and free standing applique as the centrepiece. The shoulders have ostrich feathers sewn onto them with more of the appliqués. This was my first experience of using hotfix crystals (and applying sequins) and I really enjoyed just how creative this process was. I think I’m a bit of a magpie at heart because I got far too excited by how sparkly everything was.


Although the dress was a lot of work and took a long time to make I’m so happy with how it turned out; It was surprisingly comfortable to wear and felt very special (almost how I felt when I first tried on my Wedding Dress!). The ball was incredible and I really enjoyed the evening.


Leave a Reply